Lab 5
AJAX & JSON
Asynchronous Client-Server Interaction
Lab Setup
Download the following files to your lab5 folder. Remember to Right-click the links
and select Save Link As..
1. Getting Data
-
Click on the following URL to launch a new tab:
showusers.php?key=Siena1937 - Right-click on the page that loaded in the new tab and select View Page Source
-
Note that
showusers.phpis a PHP server-side script that queries a database and returns a table of users. Rather than return an entire web page, it only returns an HTML-encoded table. The PHP code is hidden because the server is configured to return the output of the script rather than the PHP code. -
In your browser, change the URL from
showusers.php?key=Siena1937to justshowusers.php -
To view the users, you must know the correct
keyvalue. While this adds some security, anyone who knows the URL andkeycan view all the users.
Next lab, we will implement a secure login so that only "admin" users can view all the users. But, we must first learn how to send and receive data
2. GET vs POST
GET and POST are two different communication "methods" that are part of the HTTP protocol.
The GET method passes data via the URL of an HTTP request. This is useful because data
can be sent by adding variables and values to the URL, i.e., showusers.php?key=Siena1937
The POST method passes data inside the HTTP request. This is important because there are limitations to how much data you can pass via a URL. Also, it is sometimes important to hide the data you are passing.
Note that showusers.html is a JavaScript client-side script
that receives data from a showusers.php and loads it into
an initially empty div tag.
The script uses the GET method. You will change it to the POST method and
test the script.
To prevent a security attack called cross-site scripting (XSS),
The two scripts showusers.html and showusers.php must be at the same
base URL. In this case, the base URL is breimer.sienacs.com
- First, we are going to test it with the existing GET method by uploading it to breimer.sienacs.com
-
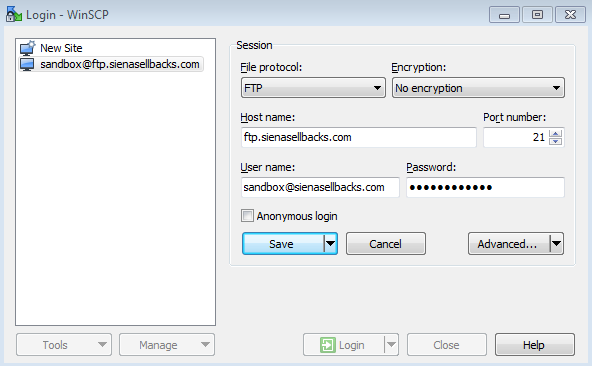
Open WinSCP and connect to the server with the setting shown in the following picture:
-
Be sure to use the following settings:
- File protocol: FTP with no encryption
- Host name: ftp.sienasellbacks.com
- Port number: 21
- User name: sandbox@sienasellbacks.com
- Password: Ask your instructor
-
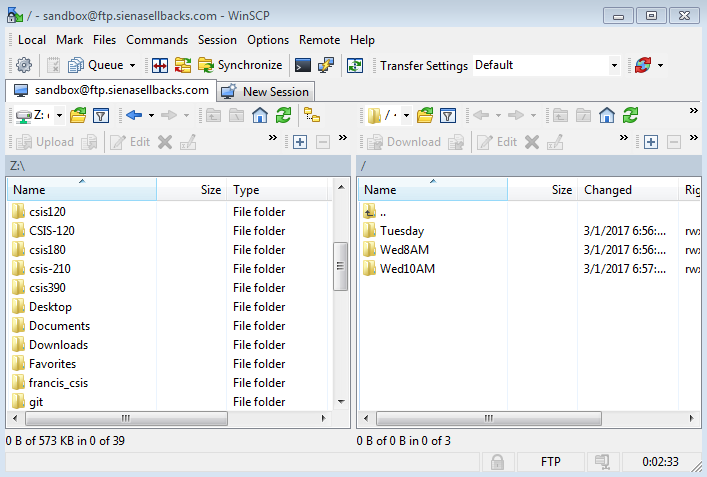
When you connect, you should see a split screen as follows:
-
On the left side, use the drop down to go to the
Z:drive and then find yourlab5folder. - On the right side, click on your lab section and create a new folder/directory inside you lab section folder/directory. Give you folder a unique name.
-
Copy your
showusers.htmlto the server by dragging it from your left-sidelab5folder to the right-side folder you just created. -
Open a new tab in Chrome and type the following URL:
http://breimer.sienacs.com/sandbox/ -
Navigate to your lab folder and the unique folder you created.
Then, click on
showusers.htmlto test the script. -
Click the Get Data button and note the alert messages that pop up.
These indicate the type of event that is triggered.
- Clicking the button triggers a "click" event which requests the PHP server-side script.
-
When the output of the script is received by the client-side script,
a "load" event is triggered to indicate that the data is ready.
JavaScript is used to assign the received data to the innerHTML of the
divtag.
-
Open
showusers.htmlin Notepad++ - Locate the two alert messages and remove them. Note that they are in two very important functions. One function makes the HTTP request and the other function receives the requested data.
-
Look at the
getDatafunction and notice that it sends an HTTP request forshowusers.php?key=Siena1937 - To better secure this script, we should not send the
keyin the URL, so we will use the "POST" method instead of the "GET" method. -
In the
request.openmethod, change the first parameter from "GET" to "POST" -
Then, change the URL from
showusers.php?key=Siena1937tosecureshowusers.php -
To send the
key, we must set the RequestHeader to mimic a posted form by addingrequest.setRequestHeader("Content-type", "application/x-www-form-urlencoded");afterrequest.openbut beforerequest.send -
Finally, pass the
keyand value into the send method as follows:request.send("key=Siena1937"); -
Save
showusers.html -
Copy
showusers.htmlto the server again by dragging it from your left-sidelab5folder to your unique right-side folder - Refresh the web page in Chrome. Be sure the URL is http://breimer.sienacs.com/sandbox/youruniquefolder/
While it seems that nothing has changed, your script is now using
secureshowusers.php, which can only receive the key using the "POST" method, so
this server-side script cannot be directly accessed via the URL, so it is harder for
hackers to exploit it.
3. POST vs JSON
Using the POST method and along with the secure HTTP protocol (HTTPS)
allows us to send data securely from a client-side script to a server-side script,
but the POST method is not a very good way to send complex structured data, like objects and arrays.
In this part, we will modify showusers.html so that it sends and receives data
using JSON encoding.
Note that POST encoding only allows you to send data in the following form: variable1=value1&variable2=value2&...&variableN=valueN. In using the POST method, quotes and braces have to be defined using special escape sequences. In contrast, any JavaScript variable, including complex objects and arrays can be easily encoded as JSON encoded strings.
- Open
showusers.htmlin Notepad++ - In the
getDatafunction, change the URL of therequest.openmethod fromsecureshowusers.phptogetusers.php - Change the setRequestHeader to the following:
request.setRequestHeader("Content-type", "application/json"); - Change the send as follows:
request.send('{"key":"Siena1937"}');
Note that getusers.php
is programmed to receive and send data in JSON format.
TASK CHECK
Save showusers.html and test it to be sure it works on the remote server.
Show you instructor that it works.
4. Parsing JSON
While it may have seemed useful to send the user data encoded as an HTML table, this makes it harder to parse the data. There may be cases where you wish to use the data to create other types of elements besides tables.
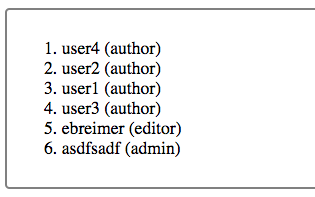
Modify the responseRecieved function so that instead of simply
inserting the JSON data into the innerHTML of the div element, it
parses the JSON and creates an ordered list:
Help:
- The JSON data represents an array and we can parse it as follows:
var userArray = JSON.parse(this.response); - Remember that we can create an ordered list element as follows:
var newList = document.createElement("ol"); - Then, we can loop for each user in the array as follows:
for (var i = 0; i < userArray.length; i++) { - Inside the loop, we can create a new
litag and append a TextNode inside theliwith the following content:userArray[i].username + " (" + userArray[i].usertype + ")" - Inside the loop, we can append the
litag inside theol - At the end of the loop, we can append the
oltag inside thedivtag.
5. Inserting Users
- Click on the following URL to launch a new tab:
insertuser.php?key=Siena1937&username=YourName&password=secrect&usertype=admin - Note that this is a PHP server-side script that inserts a new user into the database. It can accept data using GET, POST and JSON. It is not very secure.
- In your browser, change the URL to a different username and hit enter so the page is reloaded. This should add a new user to the database.
- Then, use your
showusers.htmlto see if the user was added. - Save
showusers.htmlasinsertuser.htmland implement the following form:
insertuser.html
Help:
- You can append new form elements as follows:
myForm.appendChild(makeInput("password", "Password: ", "password")); myForm.appendChild(makeInput("radio", "Admin", "admin", "usertype", "admin")); myForm.appendChild(makeInput("radio", "Editor", "editor", "usertype", "editor")); - Call the following server-side script in your
getDatafunction:request.open("POST", "http://breimer.sienacs.com/courses/csis-390-s17/labs/lab5/insertuser.php", true); - Then, you can fetch the values as follows:
var user = document.querySelector('#username').value; var pass = document.querySelector('#password').value; var type = document.querySelector('input[name="usertype"]:checked').value; - Finally, you can parse and send the data as follows:
var data = {key:"Siena1937", username: user, password: pass, usertype: type}; var dataJSON = JSON.stringify(data); request.send(dataJSON); - But, note there are now many
divtags on the page, so you should give your messagedivan id:var myDiv = document.createElement("div"); myDiv.setAttribute("id", "message"); - The
insertuser.phpwill return a response message that you can put in the messagedivas follows:function responseReceived(event) { if (this.status === 200) { document.querySelector("div#message").innerHTML = this.response; } else { alert("The request failed, status: " + this.status + " " + this.statusText); } }
TASK CHECK
Save insertuser.html and test it to be sure it works on the remote server.
Show you instructor that it works.
DELIVERABLE
Create a zip file of your lab5 folder called lab5.zip
and submit the file in Blackboard.
In the comment area of Blackboard put your partner's name.
Not finished?
The deliverable must be submitted in Blackboard by midnight on the day before your next scheduled lab meeting. If you wish to work alone, you can submit the deliverable yourself. However, you are encouraged to work with your partner and you can submit together. When submitting as a lab pair, be sure to include your partner's name in the comment area when you submit via Blackboard.
Do not share
Outside of lab, you are only permitted to work with your lab partner. Do not share your work with any other student.